07 October 2010

GE Monogram Oven, Limitations

The sliding glide-out racks can be easily repositioned in the GE Monogram wall oven.

Still, I figured, I had plenty of room to let my dough double in size.

This rack is positioned in the middle of the oven (the 3rd position out of 5 possible)

Perhaps, I was wrong.

I do love love the proof setting on my oven. Yeah, it's a bit superfluous. I was easily able to proof bread without this setting. But, I still turn to the oven to proof my bread now. It's a nice way to know I have a mildly warm constant temperature; putting the dough in the oven keeps it off my counters. Whenever I have an easy choice to keep my counters less cluttered, I gladly take it.

This is, by the way, the dough from an awesome recipe for butternut squash bread. My favorite part is that the recipe makes three generous loaves. We eat one and freeze two. My daughter loves this bread, which she calls "yellow bread." I modify the recipe by roasting the butternut squash instead of simply cooking it. I can't imagine cooking the butternut squash without roasting, when it's so easy and tasty.
Posted by Picasa

03 September 2010

Cushions? Really?

A smattering of randomness for today's blog post...

Search Terms
Firstly, banquette cushions.  Blogger recently enabled a free stats service on their blogs and I was reviewing which of my posts have been the most popular.  Here are the most popular posts of the last few months:


To me, this is nothing short of mind-boggling.  Everyone is coming here to read about my ebay-purchased cushions?  These numbers are not small, either -- TWO HUNDRED people per month are coming here to read about ebay banquette cushions.  I thought I had three readers, period.  OK, I know I have more than three readers (thank you Vy, Megan, and Paul).  But... I didn't know I was attracting 200 readers per month to read about my humble sunbrella cushions.  Once upon a time, I know that my post on Dimmable CFL Floodlights was getting the most traffic, but now it's only the 10th-ranked page (a mere 20 visitors per month for this page, if you were really curious).

Soapstone
While my counters are only third on my own blog's popularity list, those same counters earned me a spotlight "guest interview" on the Granite Gurus blog.  Check out the interview with yours truly over on Stephanie's blog, on the post titled, "An interview with a Soapstone Countertop Homeowner."

Guest Blogger
I have not only been featured as a guest interviewee on a blog, but also I have also written a couple posts as a guest blogger for my friend and colleague, Paul Anater.  Paul runs the extremely popular blog: Kitchen and Residential Design.  Through an invitation extended via Paul, I recently traveled to Boulder, CO, to attend Google's 3D SketchUp user conference (or, "unconference" in Google speak).  Since Paul was responsible for getting me to the conference, I repaid the favor by writing a couple guest posts for him.  You can read them here (Day One) and here (Day Two).

23 July 2010

A Year in Review

We've been in the remodeled kitchen for a year; by and large, we can declare the remodel a success! Here's some thoughts after a year in our new space:

My favorite part of the kitchen was and still is the end-grain butcherblock. Here is how it looks on an average day. We oil it whenever it starts to look dry, which is once every 2-6 weeks (clearly, it is starting to look dry now). I wanted to take "real" usage photos so I didn't oil it up for this post. You can see the areas of our heaviest use in the lighter "L" shape.

My least favorite part of the kitchen, by far, is our main sink faucet: KWC Systema. I loved it when I bought it. I selected it because KWC puts real quality into their faucets, and I liked how the spray head felt in my hand, and the simple style of the faucet overall.

I hate it after a year of use. It has broken once (and KWC provided excellent customer service to supply free replacement parts). What I hate the most, however, is how the spray head never docks in place. Granted, we have a lot of plumbing underneath, so the hose sometimes catches. But even if the hose doesn't catch on something, this thing still never docks cleanly. The head is too light -- it feels lighter than the hose itself -- and although it's not logical, somehow this seems to affect its ability to dock easily and completely. The normal docking state is the large photo on the left. The best state, if I purposefully try to get it docked, is the smaller photo at the top right. Another reason I do not like this faucet is because the spray, at its widest, is still very narrow (smaller photo bottom right). I want a wider spray.
On a contrasting note, I LOVE the KWC Edge on my prep sink (photo below - love that wider spray), and the KWC Systema Pot Filler. Yes, I love and use my pot filler, and I am not too proud to admit it. Snicker if you must (and trust me, many do). Yes, it only helps with filling pots. Yes, I have to lug the pots to the sink to empty them out. But I love it. If anything, the only annoying part is that I often have the pot filler extended from the wall instead of neatly folded back out of the way.

Here is my husband's favorite part of the kitchen: our 24" wide flat gas-powered griddle. This sucker was a gamble. It's the VGGT240 from Viking, and I could not find ANY reviews of it, nor could I find anyone who had used it. I hate spending lots of money on things without a proven track record. So I "gambled" (on Viking's mostly good reputation) and figured it was a pretty simple appliance so really, how badly could it go wrong? Well, the good news is that the griddle performs like a champ. My husband LOVES the big wide expanse of space and he can churn out a weekend breakfast of pancakes and sausage lickety split. When you use the griddle a lot (even a little) it starts to look nasty pretty quickly. I had a custom cover made out of walnut for the griddle. The cover is on almost always on weekdays (barring the occasional panini). It makes a nice extra bit of prep space, especially for staging ingredients to be used on the adjacent induction. More importantly, it hides the very unsightly griddle surface. As a bonus, we've found the griddle useful for mass freezer meal preparation (you know, make a gazillion servings of a meal at once and then pack it in the freezer; remove a few servings at a time for faster weeknight meals). If you have to brown a LOT of ground meat (e.g. for taco soup!), the big wide griddle is the way to go.

My husband declined to pick his least favorite part of the kitchen (of my design). Wise man!

Best design decisions:

  • Removing some storage in favor of wider aisles and an open stairway. It both feels and functions so much better.
  • Reconfiguring the island from long and skinny to short and wide. Now we can walk around it and it's truly useful on both sides.
  • Relocating patio doors to the living room, in favor of a breakfast nook table in the kitchen
Worst design decisions:
  • Not including seating directly IN the kitchen at the island, for an extended conversation with the cook (we have seating in the nook, but it's not really close enough)
  • Not redesigning our living room at the same time (it is part of the same "great room" space)
  • Locating the wall knife rack right above the griddle. Looks cool. Very functional 90% of the time. The knives heat up really fast, though, if you're using the griddle
We are still loving our soapstone. The honeymoon has worn off somewhat. I do still love it, but not with the same intensity of emotion as I did in the beginning. I would still select it again, in a heartbeat. I have difficulty imagining boring, soul-less counters in any future kitchen of mine. But -- it does show a lot more spills and water rings than I expected. Yes, I like to see signs of use. But I don't like it when those signs continually mock me, that I am a bad housekeeper. On the flipside, these counters are certainly cleaner on a daily basis than any counter I've had in the past, which is a good thing when you have kids.

The signs of use that I do embrace are chips, dings, signs of wear. Here is the biggest chip in my kitchen (and I only know of 3-4 total). It's pretty small.

Recommended without any reservations
I like Cook's Illustrated magazine when I want to understand a particular cooking technique or when I want to find reviews on kitchen implements. Their highest review rating is called "Recommended" while the next is "Recommended with reservations". Here is my list of the best products for a kitchen remodel, from my own personal experience with this kitchen. No reservations here.

The List:

  • Custom cabinetry, measured and sized to fit perfectly in your kitchen with useful inserts, dividers, etc. Custom is not much more, and is sometimes even cheaper, than semi-custom. Take the time to figure out what works best for you and GET IT. Get exactly what you want for door style, species, stain, construction quality, fitments, etc.
  • Blanco Silgranit Sinks. AWESOME
  • Instant hot water dispenser. Not everyone needs one of these, but if you even THINK that you might, get it. You'll use it far more than you expect. I now usually clean my kitchen only with hot water from this tap.
  • dimmable warm CFL lights. I guess some people think these are on their way out. I can't pay for the LED fixtures, everywhere, though. These provide great light and low energy usage. Don't let your electrician talk you out of these. Old school electricians are scared of new things, probably with good reason. These are a proven product. Don't back down! Yes, you can find dimmers that work with CFLs.
  • Kichler undercabinet LED lights. OK, so I sprung for LED on my undercabinet lights (a much smaller area to cover). They illuminate the counter really well and can be installed BY YOURSELF. So easy. Save the money on the electrician. The end result is a wash of cost that does allow you to spring for LED.
  • Schaub hardware. Love my heavy rustic iron door pulls. The weight in my hand is a real quality feel.
  • Amerock hardware. OK, so this is weird... because I'm recommending both high-end pulls as well as fairly inexpensive pulls. I used Amerock on my painted cabinetry and it cost only a third of the Schaub. But, it was the right color and design for my cabinetry.
  • GE Monogram oven and speedcook oven appliances. Fabulous -- not a single complaint, really.
  • Miele dishwasher. I had a very tricky hidden dishwasher installation and the only reason it worked, I am convinced, is because the Miele dishwasher is so precise with installation measurements. I still feel like a novice with my Miele though. It cleans wonderfully and is super quiet. I had my doubts about the cutlery tray but I AM A CONVERT. It opens up so much space in your primary dishwasher area and really is not a pain to load, like you might expect.
  • If you are buying a Ventahood liner, get it in black! It is cheaper than stainless steel. No one will see the liner anyway -- that's the point of a hood liner -- so why pay extra for stainless steel? I didn't even know they were available in black -- it's not something that is well advertised. Search it out.

I am NOT putting soapstone on the list because as much as I do love it and would do it again in a heartbeat... I don't think it's the right surface for a lot of people.

03 July 2010

The Making Of... Cherry Ice Cream

Today was my second kid's first birthday. After buying some beautiful Bing cherries at the farmer's market last week, and seeing my son down pound after pound of cherries, I figured that some cherry ice cream was in order to celebrate his special day.

Cherry ice cream -- or cherry dessert of any sort, for that matter -- is something of a labor of love. To prepare, you must stem and pit the cherries, which is a fairly monotonous task. I, however, am a pro at delegation. :)

The first picture of this post pretty well summarizes a key aspect of my kitchen: a communal gathering spot to share in a family cooking activity. I definitely had a vision of an "all hands on deck" approach to meal prep when I designed the kitchen.

In the case of cherry ice cream, a well-captioned photo essay does more to describe the journey than words could possibly do. So without further delay, here is our fresh Bing cherry simple ice cream:


On the right, my 3yo daughter stems two pounds of cherries. On the left, my 78yo mother pits them with a chopstick. She is pitting them over a bowl to catch the cherry juices. Waste not one bit of cherry goodness!

Two pounds of cherries, plus their juices, are coarsely pureed using one of my favorite appliances: my Kitchenaid food processor. This guy is about 10 years old.

In a pot, I heat 1.5 cup of heavy whipping cream to just under boiling on the induction, then remove it from heat. Then I mix in 1 cup of sugar, until fully dissolved. (I actually just turned on the hob to heat up the cream, and in the scant time it took me to measure 1c of sugar, the cream already just reached boiling. I immediately shut it off when I came back with the sugar.)

In a wide glass Pyrex bowl, I mix the cream/sugar mixture with the pureed cherries. Pink goodness. Store this in the fridge, covered, for 8h or overnight.

If you don't add plastic wrap to the surface (which I don't), then the cherry that is exposed to air will slowly darken to an almost cocoa-like appearance. This is rather inconsequential; a quick stir returns the cream mixture to the bright pink color.

Pour into ice cream maker and process per your appliance directions. We churned ours for 30 minutes. The ice cream maker is really loud, so I put it in the appliance garage and closed the door while it was churning. As the cream incorporates air, the color gets lighter.

Scrape ice cream into freezer container for storage (if you don't just eat it right away...)

Enjoy!


20 May 2010

The Making of... Hard Boiled Eggs (and an initial review of Induction, to boot)

One of the appliances that I have wanted to write about, but have purposefully held off on, is my Miele Induction cooktop (KM5753). I am the meticulous sort who actually enjoys reading the manual. I have never, however, read the Miele induction cooktop manual. This is a major confession, people!

Never having read the manual, I consequently felt unqualified to offer an informed opinion. For your benefit (ok, really mine), I decided to go easy on myself for a change, and just Write a Post. This might not be coming from the angle of a super-expert-user, but it's still interesting.

Onward -- the real topic at hand -- hard-boiled eggs!

I make textbook-perfect hard-boiled eggs. They are SOO easy, and I skip all of the tricks and "guaranteed" methods that you can find on the Internet or handed down from previous generations for their perfect HB eggs. I do not prick a hole in the end of the egg. I don't add salt. I don't add vinegar. I don't wash my eggs in baking soda first. I use the Cook's Illustrated method. The yolks come out perfect (no gray, no green, no crumbles), the white is tender, and the shells are easy to peel. Here it is:

Perfect Hard Boiled Eggs
1) put eggs in a pot with cold water (level should be 1" to 2" higher than the eggs)
2) turn the heat to high
3) when the water boils, remove pot from heat, add a lid, and set a timer for 10 minutes.
4) meanwhile, prepare an ice bath. Use a LOT of ice (at least a tray's worth).
5) when your 10 minute timer goes off, use slotted spoon to transfer the hot eggs to the ice water
6) Let sit for 5 minutes or more.

Note, it is important to use older eggs for maximum peel-ability. Let farm-fresh eggs age for at least two weeks. Supermarket eggs are typically well old enough by the time they hit the store.

This recipe works like magic... EXCEPT... if you have an induction cooktop.

Why?

An induction cooktop gets water boiling SO much more quickly than a regular cooktop, that your eggs do not spend enough time in hot water to get the yolk fully cooked. This is, after all, part of the definition of a hard boiled egg. (If you don't want the yolk fully cooked, then lookup medium- or soft-boiled eggs.)

Perfect Hard Boiled Eggs, Modified for Induction
1) put eggs in a pot with cold water (level should be 1" to 2" higher than the eggs)
2) set the heat to high
3) when the water boils, let the eggs boil for two full minutes
4) remove pot from heat, add a lid, and set a timer for 10 minutes.
5) meanwhile, prepare an ice bath. Use a LOT of ice (at least a tray's worth).
6) when your 10 minute timer goes off, use slotted spoon to transfer the hot eggs to the ice water
7) Let sit for 5 minutes or more.

This is the first recipe I have had to adapt for induction. Mostly, the primary benefits I've had in cooking with induction have been saving time. I have had my water boil more quickly to cook pasta, or, I have been able to brown my meats or heat up oil more quickly. The time saved is nice, but nothing to shout about from rooftops. Probably the area where I am most appreciative of time saved, is for sauteing diced onions for dinner. It's really nice to turn on the heat and be ready to go in less than a minute.

Another nice thing about induction is the way that the heat stays contained to pot (plus some minor residual heat on the hob if we wanted to be particular). Translation: the cooktop surface stays cool. Notice in the photo above that I have set my ice water bowl directly next to my pot of eggs. I have also put cookbooks, ingredients, and other items on the cooktop while one hob is on and cooking. The fact that the unused induction cooktop can double as working counter space is a huge benefit for small kitchens!

Some websites talk about how the reduced venting requirements of induction are another benefit. I find that to be negligible, honestly. Yeah, I don't need to vent gas fumes. My actual cooking, however, throws off enough fumes, odors, grease, and heat, and that is what really drives my ventilation requirements. Anyone who does reasonable amounts of cooking should have their ventilation requirements driven more so by their typical foods and cooking methods, and less so by their cooktop.

A couple minor frustrations with induction, for me: first, I have only 9 power levels on my cooktop (or at least I think I have only 9 -- gotta read that manual). Sometimes I have trouble getting an exactly perfect big-slow-rising-bubble simmer (such as I want when I am making chicken stock). Level 6 is too high (active happy bubbles), Level 5 is too low (no bubbles). I go with Level 6.

Second, different induction-capable pans perform differently on my cooktop. I have two 8qt stockpots that seem very similar. The one with the smaller but thicker base boils water MUCH faster than the one with the wider but thinner base. (Perhaps not coincidentally, the smaller/thicker base pot is more $$ than then wider/thinner base pot.) At first I wondered why my induction cooktop did not boil as quickly as the Induction Gods had promised me. After more usage, however, I realized that my other pots DID boil quite quickly.

The biggest benefit of induction for me thus far, honestly, is the fact that it is so easy to keep clean. It is WAY easier to keep clean on a daily or weekly basis than my old gas cooktop. Most stuff scrubs right off the induction cooktop with wet microfiber cloths, and the occasional razor/scraper takes care of the rest. I actually have never used ANY cleaner on my cooktop (not even gentle dishsoap) and a whole year later, it looks pristine (if I want it to). My gas cooktop always had gunk near the flames and residual grease on the cast iron burners. Spillovers were a real pain to clean.

Summary: Induction, thumbs up. Now, if you'll excuse me, there is a perfect hard boiled egg calling my name!

10 January 2010

The Making Of... French Bread

As many others in this New Year, I have taken some introspective time to reflect on my priorities. Some of the things that I enjoy, that I want to do more of, are cooking new recipes in my new kitchen, and blogging. Thus inspired, I am starting a new series of posts, titled "The Making Of...", where I will visually document recipe testing in my new kitchen.

This blog post is dedicated to Paul Anater, at Kitchen and Residential Design. Paul is an online kitchen design mentor for me, as well as a fabulous baker. One of the recipes he posted awhile back is for a homemade sourdough french bread. I decided to give this recipe a try, as I was attending a French dinner and wanted to make my own bread for my French Onion soup (from Julia Child).

Recipe
You can find the recipe on Paul's blog here.

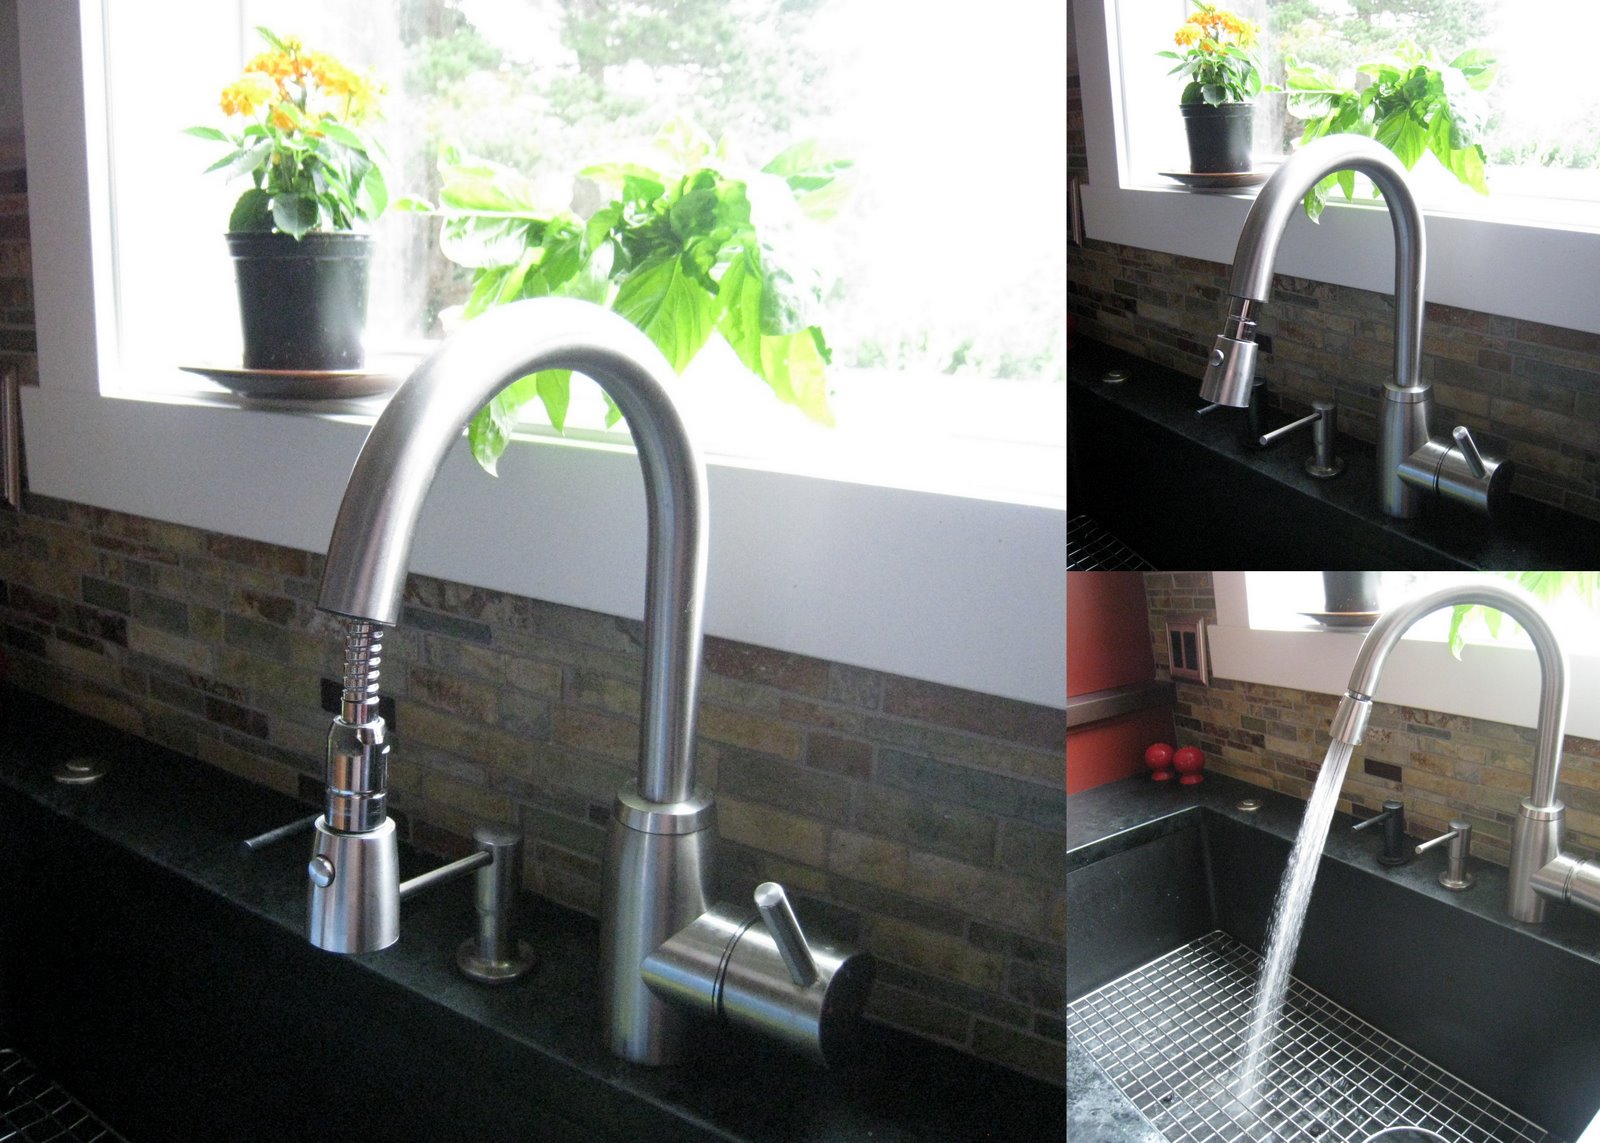
Kitchen Features Used:
- lowered height baking counter
- "proof" setting on my GE Monogram ZET1 oven
- rolling racks of same ZET1 oven

Result:
The bread was GREAT fresh out of the oven, and everyone in my family loved it. I have never made a bread by hand before. (In fact, I had to google how to knead bread!) Yet, this recipe was sooo easy. Is all baking this easy? I would have to guess "no."

This is definitely a dense french bread. I know some like a lighter, holier french bread. This bread was almost perfect for me. I like a thick dense crumb for my baguettes.

I felt my kitchen appliances and layout performed well for this recipe. The main snag is that I haven't organized my kitchen yet, to put all baking supplies in my baking area. (I realize this is ridiculous given that I have a designated baking area.) I also do not have a water source in my baking area, so that required lots of steps. Not a big deal.

The Process:
1. Make your sourdough starter the night before, and let it sit overnight

2. The next day, about 4 hours before you want the bread out of the oven, add water to the starter and break it up.

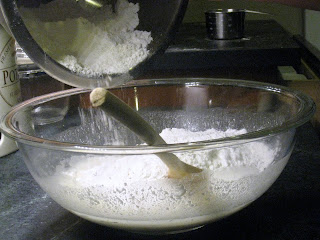
3. Add dry ingredients, fold it all in and mix.

4. Turn shaggy dough onto floured counter.

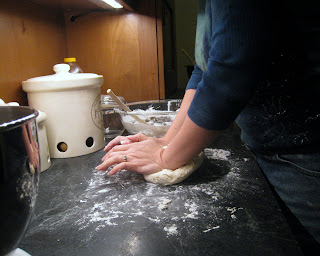
5. Knead for 10 minutes.

Kitchen note: I put a lowered baking counter in my pantry, but honestly my initial motivation was for the look and feel of it. I love the cozy statement of a lowered baking counter. I have never, however, kneaded bread (see above), and rolling out a single pizza crust or pie crust is not so labor intensive that a lowered counter is imperative. Let me tell you though, if you are going to knead firm elastic bread dough for 10 minutes, you NEED that lowered baking counter! It really helps if you lean into it, which is much easier with a lowered counter. My baking counter is 32" high.

6. Let the dough rise about 2 hours until doubled in size.

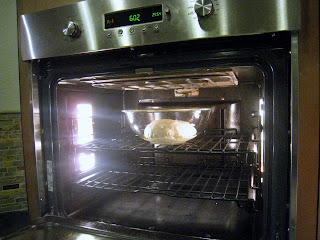
Kitchen note: After letting the dough rise, I felt it hadn't doubled in size per Paul's directions, despite my selecting a warm area. So, I popped it in my oven on the "proof" setting. This is a very very low heat, basically the equivalent of a light bulb. I could have just used a warm area in my kitchen, but it was definitely handy to have the dough bowl off the counter and out of the way. I must admit I have proofed dough before, in other kitchens, by turning on my oven light and putting the dough bowl in the oven. The "proof" setting on my oven is just a fancy way of doing the same thing. But hey, it's there, so I used it. Of course, you keep the oven door closed for proofing (this door is open just for photo taking, and then it was closed). You can see the "Prf" in orange letters on the upper left of the oven display, which is the confirmation that I have selected the Proof setting on my oven.

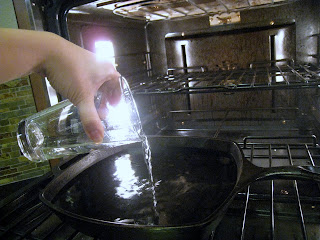
7. Setup your "steam oven" by setting a pan of water on a bottom rack during preheat.

Kitchen note: At this point, I was very glad to have rolling full-extension racks. I didn't have to carefully slide a sticky oven rack, loaded with a big water pan, back into the oven, worried that it would spill or generally slosh all about. I just pulled out my rack, set the pan on it, filled it with water, and then rolled it back into place. The rack rolls on ball bearings so the smooth ride ensured a spill-free result. These full extension racks are really nice in many places, but this is the first time using my kitchen I felt explicitly pleased to have this feature.

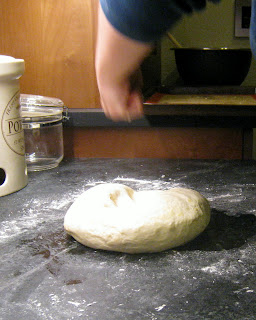
8. While the oven preheats, punch down your dough

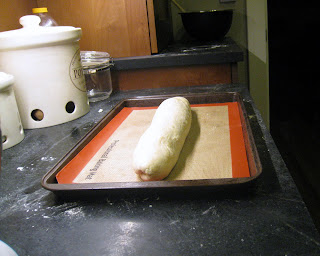
9. Shape it into a long thin loaf (about 3" diameter) and let it rise another half hour.

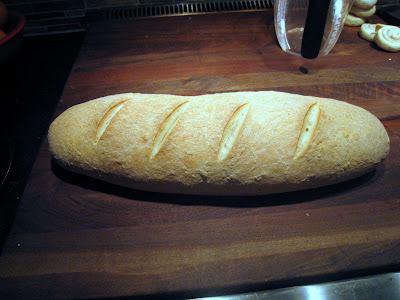
10. Bake for half an hour. Take it out and admire bread made with your own two hands.

11. Pretend to let it "cool down." Slice and serve!